
Astra
Introduction
Welcome to the Astra documentation! This documentation is a reference for all the available features and options of Astra.
Lost?
- View the Demo: A visual way to understand what Astra is.
- FAQ: Looking for more information about Astra in general? The FAQ might be able to answer some.
- Take a Look at What's in the Box: View what you get when you use Astra as your infrastructure platform.
- Contact Me!: if you haven’t yet been in contact or received your Astra API key. Please note that the CLI will not function without this key.
- Bootstrap Your Infrastructure: Start here if you’re looking to go from zero to one on your infrastructure.
- User Reference: This section is for new users looking to operate and manage their infrastructure with Astra.
Background
Astra is a specialized cloud infrastructure toolkit designed to fast-track SaaS companies from initial setup to hyper-growth. It automates the provisioning and management of secure, best-practice-compliant infrastructure, so you can focus on building your product instead of wrangling cloud services.
Astra's vision is based on a few core goals that I believe make for an effective infrastructure:
-
Comprehensive Support: Recognizing that every startup is unique, Astra is designed to handle the majority of scenarios (the 80% case), while the included support assists with the remaining scenarios (the 20% case). This approach effectively positions Astra as a reliable third-party infrastructure team, offering design guidance and help in creating tailored infrastructure solutions.
-
Designed with Maintenance in Mind: Astra is developed with the operational engineer's needs as a priority. Questions like, "Who will maintain this?" and "What is the simplest way to maintain this?" are crucial. Astra is built to ensure that its output can be easily and ultimately maintained by a human engineer, ensuring that you are not solely dependent on Astra for any aspect of your infrastructure, while significantly easing the process.
-
Only What You Need, and Nothing More: Astra adheres to the YAGNI (You Aren't Gonna Need It) programming paradigm, a practice we believe is key to avoiding technical debt. Astra does not set up any unused elements from Day 1, yet it prepares your infrastructure for potential future expansion. This approach renders Astra both cost-effective (the average cost of a basic Astra setup is under $30 a month for AWS) and straightforward, including only the essentials for your success.
-
Zero-Cost Simplicity: Astra not only aims for simplicity in its creations but also in its offerings. The Astra CLI is developed with the goal of reducing cognitive load for users. It simplifies complex interactions between services into manageable, user-friendly actions, without compromising configurability or security.
Frequently Asked Questions
- Who benefits from Astra?
- What problem does Astra solve?
- What's this about support?
- How does support work? What happens if something Astra provisions goes down?
- What is my relationship with Astra vs my Cloud provider?
- How does Astra ensure compliance and security?
- What sort of things does Astra set-up/give me?
- How is Astra priced?
- How does billing Work?
- How does Astra stand out from the competition?
- Which cloud platforms are currently supported?
- What happens if I don't want to use Astra anymore?
- Why does Astra require an API key?
- What is the cost of the infrastructure Astra creates by default?
Who benefits from Astra?
Ideal for SaaS startups at the early stages of cloud infrastructure development, Astra offers a straightforward approach for setting up, maintaining, and managing your cloud solutions efficiently. If you're looking for an opinionated, simple solution, Astra is it.
What problem does Astra solve?
Astra solves the problem of operational and technical complexity for early-stage infrastructures. If you've ever read the documentation on Kubernetes and a term like DaemonSet with Node Affinity/Anti-Affinity Rules doesn't sound fun, then Astra is for you.
It does so by not offering yet another cloud solution, but instead taking the best tooling from your chosen cloud and making it trivial to operate.
What's this about support?
Astra works in the same way as any third-party software team (For example: https://www.latacora.com/). Our approach involves:
-
Setting Up Infrastructure: We personalize the establishment of your infrastructure and provide you with the necessary tools for managing daily tasks.
-
Guidance and Direction: When you need additional assistance related to your infrastructure, we step in to offer direction and support. This can be particularly beneficial for tangential issues that will arise.
-
Ease for Early Developers: The combination of an easy-to-use toolset and readily available support ensures that early-stage developers have one less thing to worry about while taking care of business needs.
-
Preventing Technical Debt: With Astra, you can avoid the scenario of waking up to an overwhelming amount of technical debt in your infrastructure, a common challenge for growing companies.
-
Hive-mind Updates: The technology industry is ever-evolving, meaning infrastructure can become outdated quickly. Whenever we encounter new strategies for building and managing infrastructure or find innovations that save time, we proactively update your setup. This ensures you always benefit from the latest advancements and efficiencies.
How does support work? What happens if something Astra provisions goes down?
Astra's support system is structured to ensure prompt and effective assistance:
-
Primary Communication Channels: Support is primarily provided through Slack, supplemented by video calls as needed. If your company does not use Slack, email is available as an alternative.
-
Response Time: Any questions raised in the Slack channel will typically receive a response within an hour during normal Eastern Time (ET) business hours, 9 AM to 6 PM.
-
Included Consulting Time: Each full engagement with Astra includes 4 hours of contracting/consulting time.
-
Additional Support Costs: If additional support is required beyond the included number of hours, it is billed at the current contracting rate, per hour.
-
Account Provisioning: While not mandatory, it is often beneficial to provide Astra employees with access to your accounts and Terraform repository. This enables us to assist more effectively and to submit automatic pull requests for upgrades.
-
Handling Downtime: In the event of downtime in your infrastructure or product, Astra will provide support during normal business hours. However, Astra does not assume responsibility for incidents. All infrastructure designed by Astra prioritizes reliability, and through our support, we can offer additional solutions if needed.
What is my relationship with Astra vs my Cloud provider?
Astra is a toolkit you use in addition to the tools your cloud provider provides for you. That's the extent of the connection.
Purchasers of Astra will still have to pay their own cloud provider billing and handle interactions with the cloud provider on their own. Astra does not have any control over issues that stem from your cloud provider.
The good news is that the Astra support package includes set aside hours for helping each company with these interactions.
- Bill too high? Astra support can investigate what can be cheaper, set up billing alerts, and discuss options.
- Having an issue with your infrastructure only AWS can handle? Astra support will help you contact AWS, explain the issue, and get to a resolution.
How does Astra ensure compliance and security?
Astra is uncompromising when it comes to compliance and security. Our approach is designed to:
-
Facilitate Security Audits: Astra's configurations and processes are tailored to position your infrastructure optimally, making it easier to pass any security audits.
-
Thoughtful Actions: Every action performed by Astra is carefully considered for its impact on the broader security landscape. This ensures that each aspect of your infrastructure contributes positively to overall security and compliance.
-
Proactive Security Measures: We continuously update and refine our practices to align with the latest security standards, ensuring that your infrastructure is not only compliant but also resilient against emerging threats.
What sort of things does Astra set up/give me?
There are two parts to Astra usage.
- The bootstrapping step which you can view the included infrastructure here.
- Normal usage, which you can refer to the user reference for feature list.
How is Astra priced?
Astra's pricing is strategically set against the cost of hiring a full-time professional to build and support similar infrastructure.
For startups, the expense of employing a full-time, benefitted individual can be significant and time consuming. Additionally, the costs associated with resolving infrastructure technical debt can be even more daunting. Astra offers a cost-effective solution, priced at a fraction of what it would take to hire a full-time employee. This approach not only fits startup budgets, but also provides the feel and benefits of having an in-house expert available to address any issues that may arise.
How Does Billing Work?
Astra's billing process is designed to be straightforward and transparent:
-
Monthly Billing via Stripe: Astra charges are processed monthly through Stripe. Allowing you to pay however you feel comfortable.
-
Additional Support Charges: If your support needs exceed the included hours, additional hours are billed at $200 per hour.
-
Billing Schedule: Your bill for any given month, including additional charges for extra support hours, will be issued on the first day of the following month. This ensures a consistent and timely billing process each month.
-
Flexible Cancellation Policy: You can cancel your Astra subscription at any time. You will only be billed for the actual time the service was used up to the point of cancellation.
How does Astra stand out from the competition?
About more than just money
The field of infrastructure-as-a-service is notably crowded, with many companies prioritizing scale and profit. These companies often offer additional abstraction layers on top of cloud platforms or open-source projects, or in some cases, even build their own cloud services.
What sets Astra apart is our fundamental approach to customer relations and business ethos. Unlike many in the space, Astra is not driven by investor interests or directed by a board of directors. Our primary goal is not to maximize profits, but rather to ensure your complete satisfaction with our service. We are a self-sustained entity, heavily invested in facilitating your ability to seamlessly interface with your infrastructure. This customer-centric approach is what differentiates Astra in a field where others may prioritize financial gain over any single user's experience.
Your Infrastructure easily maintained
Lastly, Astra is about setting up a platform that solely belongs to your business and grows with you. We have worked hard to make sure what you get is what you will use(and therefore want to pay for). We've also made it easy to leave should you want to take your infrastructure in a different direction.
No other product on the market gives the level of flexibility, ownership, and support that Astra does.
Which Cloud Platforms are currently supported?
At present, Astra supports only Amazon Web Services (AWS). AWS is recognized as one of the most widely used and well-known cloud platforms, making it an ideal initial choice for our services. We are committed to expanding our support to include additional cloud platforms in the future. However, as of now, there is no specific timeline for the integration of other cloud services.
What happens if I don't want to use Astra anymore?
That's great! Astra is designed with the goal that it will eventually be transitioned to a dedicated infrastructure team. Here's how the process works if you decide to stop using Astra:
- Cancellation Request: You can easily request cancellation through the included Slack support channel.
- Refund Policy: A refund will be issued for the unused portion of the current month's charges.
- Ownership of Infrastructure: Any infrastructure set up and configurations created through Astra or through contracting will remain yours indefinitely, with no obligations attached.
- CLI Tool Access: The Astra CLI tool will continue to function for a grace period, the duration of which depends on the length of your engagement with Astra. For example, long-term users will receive a longer grace period to transition away from the CLI tool.
- Happy infraing!
Why does Astra require an API key?
TL;DR: For enhanced convenience and user experience.
You might wonder why Astra doesn't simply rely on your native cloud's authentication system. The reason is straightforward: Astra is designed to simplify your work. It achieves this not only by automating and applying best practices to complex tasks but also by reducing the cognitive effort required in managing your infrastructure.
However, this simplification process is not without its challenges. Cloud providers' solutions may not always align with what feels 'easy' or 'intuitive' to users. To bridge this gap, Astra enhances these processes and supplements them with additional data. This additional layer of functionality necessitates a secure method to store and access this enriched data.
To address this, we store this enhanced data(Just id numbers and relationships, no PII) in Astra's database. Your CLI then retrieves it securely, and in doing so, necessitates the creation of an API key. This API key is more than just a security measure; it's a gateway to a more streamlined and efficient management of your infrastructure, ensuring that Astra's enhancements are both secure and easily accessible.
What is the cost of the infrastructure Astra creates by default?
By default Astra provisions the bare minimum, in a YAGNI philosophy, that still produces everything you might need when your startup is just starting out.
This means the cost of deploying just one service on Astra cost is in the realm of ~$30 per month. As is the nature of infrastructure that number doesn't scale one to one with services and the cost for the things that Astra creates by default is somewhat fixed.
Best practices
- Intro
- Required: Astra Requires the Use of Containers
- Required: Environment Variables and Application Configuration
- Recommended: Treating Secrets as Configuration
- Required: Using Terraform for Out of Astra Infrastructure Changes
- Suggested: Keep database migrations simple
- Suggested: Streamlining Deployments, Releases, and Versioning
- Suggested: Implementing Telemetry
- Suggested: Opting for ECR as Your Container Repository
Intro
An undeniable, intricate bond between the infrastructure and the application logic. The architecture of your application is fundamental to its functionality, significantly influencing its operational efficiency and the quality of the developer experience it delivers.
This developer experience might not seem to matter at first glance, but like everything in this world small things add up over time and become large things.
With this in mind, I've tailored Astra to align with a variety of best practices I've gathered over my years of experience in developing both infrastructure and applications.
Adherence to everything on this list isn't mandatory, but following it ensures that Astra operates optimally and you avoid unnecessary complications. Down the line the hope is that this will lead to fewer big things you'll have to deal with.
Lastly, Astra is meant to be opinionated; as standardization means consistency. So while the best practices listed below might not be the objective right way to set things up for everyone, we've found they tie together well with our values and make for a smooth ride.
These best practices are divided into three categories:
- Required: Without these, Astra's functionality will be severely limited.
- Recommended: Skipping these may hamper Astra's functionality, but it will remain mostly usable.
- Suggested: Astra's functionality will be mostly unaffected if these are not followed.
Required: Astra Requires the Use of Containers
Astra is designed with a cloud-native approach, assuming familiarity and use of containers as integral to its operations. Its paradigms and most features depend on container usage, which is essential for leveraging the full capabilities of Astra.
This document outlines processes and best practices that are centered around container utilization.
If you're new to working with containers or have any questions, Astra's support is ready to assist you!
Required: Environment Variables and Application Configuration
The topic of handling application configuration can prompt a wide range of answers, with each being valid in its context. Astra adopts a method that aligns with the cloud-native principles outlined in the 12-factor application philosophy.
This means your application should be designed to accept environment variables as a primary means to receive configuration values. Here's a closer look at this approach:
Reading Everything into an Object/Struct
Your configuration needs to be accessible across various parts of your code. This is typically achieved by loading the configuration into a single object or struct. This object can then be shared among different parts of the application that require access to these configuration values.
Below is a simplified example (note: this is illustrative and not actual working code):
// First, define your configuration struct
type AppConfig struct {
    DatabaseURL   string `json:"databaseUrl"`
    ServerPort    int    `json:"serverPort"`
    EnableLogging bool   `json:"enableLogging"`
    APIKey        string `json:"apiKey"`
}

// Then, create a function to read configuration from a file
// and populate the AppConfig struct, returning the populated struct.
func LoadConfiguration(file string) (AppConfig, error) {
    var config AppConfig
    configFile, err := os.Open(file)
    if err != nil {
        return config, err
    }
    defer configFile.Close()

    jsonParser := json.NewDecoder(configFile)
    err = jsonParser.Decode(&config)
    return config, err
}
Create a Hierarchy
I recommend establishing a hierarchy for parsing your application's configuration. The recommended order is as follows:
defaults(optional) -> config(optional) -> env vars[required] -> flags(optional)
This hierarchy implies:
-
By default your application should populate the struct with pre-set hardcoded defaults. Defaults are a great way to kickstart your development for newer developers.
-
Next, your application should search for configuration files in specified locations. While not used in deployments, configuration files are valuable during development, offering a convenient alternative to repeatedly setting environment variables.
-
Subsequently, your application should prioritize environment variables. These are always prefixed with your application's name, ensuring a direct match with the configuration struct fields. For example, an application named "testbed" would look for the following environment variables:
TESTBED_DATABASE_URLTESTBED_SERVER_PORTTESTBED_ENABLE_LOGGINGTESTBED_API_KEY
🪧 Environment variables are essential, as container orchestrators rely on them to inject configuration into your application container.
- Lastly, while optional, your application can also accept flags to adjust its configuration.
Each level of the hierarchy has the potential to overwrite values from the previous level, but only if it provides a value for a given key.
For example:
DatabaseURLdefaults tolocalhost:5432.- The configuration file specifies
test.db.staging:5432. - An environment variable sets this to
db.prod:5432.
Given this setup, the effective value would be db.prod:5432 because environment variables are prioritized
over defaults and config files in the hierarchy.
However, if you launch your application with the flag --database_url="db2.prod:5555", this
flag's value (db2.prod:5555) overrides all others due to its higher precedence.
Some Other Important Points
Use an Established Library
This configuration pattern is well-established. Typically, your chosen programming language will offer one or several libraries that facilitate easy setup of this structure.
Should you require additional guidance on implementation, Astra support is available to assist.
Developer Experience is Important
-
Enhancing the developer experience, though a secondary objective, is crucial. Writing application code (and documentation) in a way that allows newcomers to easily engage with the project adds immense value.
-
Defaulting to non-critical values wherever possible enables new developers to start working on the project without hurdles. Ideally, running the application locally should "just work." Configurations can then be adjusted by the developer to suit different environments or specific development needs.
-
Getting to this point can require some planning, for example: certs. You might be thinking "if my application needs certs I'll have to have new developers generate them before they can start developing the application." Avoid this for as long as you can. With a little ingenuity most of this can be offered to the developer free of cost. Embedding a localhost cert into the binary and creating a configuration where the localhost certs can only be turned on in development is an easy way to give a better developer experience around writing application code for newer developers.
-
While using sensible defaults is advisable, not all settings will have obvious default values. In cases where essential configurations lack defaults, the application should explicitly fail to start, signaling the absence of necessary values. In the spirit of lowering the bar to entry your project can maintain a command that allows people to generate a configuration file where the missing values dev values can be inserted for ease of use.
Challenges with Expressing Configuration Through Environment Variables
-
Nesting Complexity: One common issue with environment variables is their inability to naturally express nested configurations. Given that underscores are typically used to delineate names within the same hierarchical level, it can become unclear how to represent multi-level configurations. For instance:
type AppConfig struct {
  Database *Database `json:"database"`
}

type Database struct {
  SomeURL string `json:"some_url"`
}
Fortunately, many libraries supporting environment variables have mechanisms to accommodate nesting,
often through the use of additional prefixes. For example, an object like database.url might be represented as
TESTBED_DATABASE__SOME_URL in environment variables.
-
Complex Structured Types: Another challenge arises when attempting to express configurations that involve complex structured types within environment variables. The recommended approach for such cases is to employ a serialization format, commonly JSON. Consider the following example:
type AppConfig struct {
// Assuming this is a complex object that is difficult to directly map to environment variables.
  EmailSettings *EmailSettings `json:"email_settings"`
}

type EmailSettings struct {
  SMTPHost string `json:"smtp_host"`
  SMTPPort int    `json:"smtp_port"`
}
Then within the env var we can just put a JSON object:
# It should be noted that this isn't a very good example as it can be well represented by env vars but the general idea stands.
export TESTBED_EXTENSION_SETTINGS="{'email_settings': {'smtp_host': 'smtp.example.com', 'smtp_port': 587}}"
Recommended: Treating Secrets as Configuration
Handling secrets poses a unique challenge, as they cannot be managed in the same manner as other configuration data due to their sensitive nature. However, Astra integrates secrets management seamlessly, ensuring they are as accessible as other configurations without sacrificing security.
For an introduction to managing secrets with Astra, refer to the guide on using Astra for secret management.
Astra simplifies the process of updating secrets by assigning a new identifier to each updated secret. This approach allows for straightforward updates and the ability to revert to a previous version if necessary.
🪧 I wont give you the security wag of the finger here, but it's important to remember that these are secrets and they're only as good as their weakest link. Be careful about how you treat and share them.
Required: Using Terraform for Out of Astra Infrastructure Changes
While Astra endeavors to fulfill a broad range of infrastructure requirements, it acknowledges the impossibility of catering to every possible need. As such, you may find yourself seeking to customize or exert more control over your infrastructure.
Astra facilitates this by exporting its operations to Terraform configurations, allowing for modifications as per your preferences.
The recommended approach involves treating your Terraform files with the same rigor as application code. Early in your startup's lifecycle, adhere to a straightforward workflow of:
approve -> apply -> merge
- Approve: Run any changes to your Terraform through the normal software review process. Create a PR, get it reviewed, the works.
- Apply: Once approved, communicate with your team you're about to apply your changes and then run
terraform planto verify they are indeed the changes you would like to run. After you're convinced you have the correct changes runterraform apply, check again, and hit the big red button! - Merge: Finally merge the pull request so your changes are immortalized in git's history.
🪧 You can find additional Terraform Best Practices here.
Suggested: Keep database migrations simple
Database migrations can be daunting since touching your database with any schema change can result in bad things.
I've had success with the following process:
-
Utilize a Migration Library: Choose a migration library that seamlessly integrates into your development workflow. While some libraries offer command-line interfaces (CLIs), prioritizing simplicity is key. Opt for libraries that can be directly incorporated into your codebase, reducing the need for additional management overhead.
-
Automate Migrations at Application Startup: Implement your migration process as an integral part of your application's startup routine. This approach ensures that migrations are executed consistently and are version-controlled within the same repository as your application code, adhering to standard coding practices. Such integration simplifies the deployment process and ensures that migrations are consistently applied across environments.
-
Prefer Rolling Forward: Migration tools typically support both forward ("up") and backward ("down") migrations. While having the option to revert changes ("down") is valuable, it's advisable to focus on rolling forward in case of issues. If a migration introduces a problem, address it by applying a new "up" migration. This strategy maintains the integrity of the migration path, ensuring a clear and linear history of database schema changes, and facilitates easier understanding of the database's evolutionary path.
-
Test Migrations with Production-Scale Data: It's common practice to test migrations on development databases, which may not reflect the complexity or scale of production environments. This discrepancy can lead to unanticipated issues, such as prolonged table locks during migration, potentially impacting application availability. To mitigate this risk, simulate migrations using datasets of similar size and complexity to those in production, ensuring that your migration strategy is robust and reliable under real-world conditions.
Suggested: Streamlining Deployments, Releases, and Versioning
Deploying in a structured fashion can be difficult. Astra helps a ton by taking care of some of the harder parts of what it means to deploy an app expected to be used 24/7, but there is so much more to be done. Some small notes on how you should be thinking about your deployments:
-
Treat Deployments as Immutable Snapshots: Consider each deployment a fixed snapshot of your application at a specific moment. Avoid altering settings or configurations post-deployment. Instead, incorporate any changes, including environment variable adjustments, in a new version of the application and proceed with a standard deployment process. This practice ensures consistency, making it simpler to troubleshoot by providing a stable reference point for the production environment.
-
Adopt Software Versioning: Although immediate implementation isn't necessary, developing a routine for versioning your releases is beneficial. Semantic versioning (semver) is recommended for its clarity and systematic approach to version increments (patch, minor, and major). This not only fosters a culture of precision but also makes it straightforward to identify what version is currently in production.
-
Prepare for Rollbacks: Stability hinges on the ability to revert changes when new deployments introduce issues. With Astra, rolling back is streamlined, thanks to the tracking of application changes via the manifest file. Being prepared to rollback ensures that any destabilizing changes can be quickly undone, maintaining the integrity and stability of your application.
Incorporating these practices into your deployment and release strategy enhances the manageability and reliability of your software, aligning with industry standards for continuous delivery and operational excellence.
Suggested: Implementing Telemetry
As your application scales, the need for comprehensive telemetry to gain insights into its operations becomes increasingly critical. Here are two fundamental recommendations to establish a robust telemetry framework:
-
Use OpenTelemetry: OpenTelemetry has standardized application telemetry so that it's easy to build tools that collect and process it. Most languages have libraries which adhere to these standards. Using opentelemetry means you aren't tied forever to a single telemetry paradigm. If you start with datadog, but want to switch later down the line to save costs(a common scenario) it's easy(ier) to switch.
-
Use a logging library which has multiple outputs: Reading JSON is for computers, not for humans. When your application is in development mode, use plaintext and colors to make parsing logs easy to read. When you're in production and your logs are being ingested by a tool, use JSON.
Suggested: Opting for ECR as Your Container Repository
Incorporating your application into a Docker container necessitates a reliable repository for storing and managing these containers. Astra facilitates this by integrating with AWS Elastic Container Registry (ECR), offering a seamless solution for your container orchestration needs.
To locate your ECR registry address, utilize the service get command provided by Astra. This address is pivotal
for managing your Docker images. For detailed instructions on uploading containers to ECR,
consult the AWS documentation on pushing Docker images to ECR.
A straightforward example to authenticate, tag, and push your Docker images to ECR might look like this:
# Set Astra authentication for the staging environment
~|⇒ astra auth set staging -r staging_admin

# Log in to AWS ECR
~|⇒ aws ecr get-login-password --region us-east-2 | docker login --username AWS --password-stdin 3335161047939.dkr.ecr.us-east-2.amazonaws.com/testbed

# Push your containers
~|⇒ docker push 335161047939.dkr.ecr.us-east-2.amazonaws.com/testbed:latest
~|⇒ docker push 335161047939.dkr.ecr.us-east-2.amazonaws.com/testbed:2.6.3
🪧 As mentioned in the section on deployments and versioning, taking time to version your application is a good habit. This means that tagging your docker containers with the appropriate version is very important.
What does Astra actually provide me with?
Astra is a CLI tool that you download and run from your local command line with an included support contract.
Astra guides the user through not only setting up their infrastructure from scratch, but also gives them the tools to interact with their infrastructure. All the while Astra does everything using the most up-to-date best practices, orchestrating everything it does via Terraform and native cloud api calls. Making sure that if you ever need to leave Astra behind, everything is ready for human consumption.
At a high level
When Astra is fully bootstrapped and ready to use you will have:
- A fully functional cloud infrastructure.
- A fully editable repository with all the associated Terraform for that infrastructure.
- The ability to deploy your containerized application with zero downtime.
- The tools to manage application configuration and secrets in a secure manner.
- A networking plan, proper DNS management, and much much more.
What exactly does Astra create and how does it contribute to my overall infrastructure?
We'll focus on AWS since Astra only supports AWS for now.
Here are the biggest areas of software infrastructure that Astra focuses on:
- Container Orchestration
- Security
- Users, Access, & Permission Management
- Networking
- VPN & Internal Access
- Account/Environment Separation
- Telemetry
- Infrastructure as Code
- CI/CD & Distributed Cron
Container Orchestration
Why It Matters
Every company needs a method to deploy their applications quickly, flexibly, and reliably. Containers are table-stakes for anyone working with modern tooling and therefore having a way to easily manage your containers is a must.
While many companies opt for Kubernetes due to its rich ecosystem and popularity, the hidden drawbacks—such as its complexity and the cognitive load it imposes—are often overlooked. Even Kubernetes deployments managed by external providers still necessitate at least one expert to navigate and maintain the system effectively.
Astra's Solution
Astra simplifies the deployment process by automating the setup of AWS Elastic Container Service (ECS), utilizing AWS's serverless platform, Fargate. This approach allows Astra to offer the robust capabilities of complex systems like Kubernetes and other container orchestrators while delegating the system's maintenance and management to AWS.
With Astra, there's no need to manage underlying node pools or navigate through complex overlay networks. Instead, Astra provides a streamlined interface that enables you to deploy your containers effortlessly. Enjoy the advantages of modern container orchestration, such as zero-downtime deployments and self-healing, without the traditional overhead.
Security
Why It Matters
Establishing a robust infrastructure is challenging enough without the added complexity of implementing proper security practices and processes. This can often feel overwhelming, ensuring everything is structured correctly to protect against threats.
Security demands a thorough consideration of everything we develop, ensuring it meets high quality and security standards to prevent potential company-wide breaches.
Astra's Solution
Astra takes security seriously—no compromises. By adopting an opinionated stance, Astra integrates good security practices into your daily routines through simple usage of the product!
Astra provides excellent security features right from the start, making security a seamless aspect of your infrastructure management. Here are some of the security benefits Astra offers:
- Automatic provisioning of renewing TLS certificates for any new service you create.
- Simplified integration with Single Sign-On (SSO) to streamline access control.
- Comprehensive management of permissions and users, ensuring all user actions are logged with CloudWatch.
- Implementation of session timeouts, automatic cleanup, and other processes to enhance security.
- And much more!
Astra's approach ensures that security is not an afterthought but a fundamental part of your infrastructure management, offering peace of mind and robust protection.
Users, Access, & Permission Management
Why It Matters
Without rehashing the previous topic on security, access and permission management is extremely important in any budding infrastructure. As your infrastructure grows you'll want it to grow along with your team. Part of that growth is making sure that everyone has the protection of least-privilege permissions.
As your infrastructure continues to expand you'll find that managing users and permissions becomes more and more cumbersome.
Astra's Solution
Astra attempts to lower the bar of this complexity without skimping on security. Astra allows you to easily set up new users, create new permissions, and assign access in this fashion with ease.
Networking
Why It Matters
The evolution of software-defined networking allowed AWS to simplify networking for many cloud users, making it almost an afterthought. However, those who experienced early success soon discovered that networking complexities would emerge with growth.
Cloud networking is often overlooked until companies face limitations due to earlier, less informed decisions.
Astra's Solution
Astra anticipates your networking needs for scalability and beyond. By planning your network architecture early, Astra ensures you will have the necessary space and flexibility in your underlying network to support growth and expansion.
Astra organizes your network into large, manageable, and predictable segments, providing not just ample room for expansion but also a clear strategy for it. Each potential requirement is forecasted, with IP address ranges pre-assigned to facilitate smooth scaling. Here's an overview of how Astra structures your network for optimal scalability:
--------- Snippet Subnetting Diagram---------
Amazon VPC Addressable Block [10.0.0.0/8](16,777,214 hosts)
  Production-East1 [10.1.0.0/16](65534 hosts)
    US-East-1-A [10.1.0.0/18](16382 hosts)
      Subnet 1 (Public)  [10.1.0.0/20](4094 hosts)
      Subnet 2 (Private) [10.1.16.0/20]
      Subnet 3 (Spare)   [10.1.32.0/20]
      Subnet 4 (Spare)   [10.1.48.0/20]
    US-East-1-B [10.1.64.0/18]
    ...
    US-East-1-C [10.1.128.0/18]
    ...
    Spare [10.1.192.0/18]
  ...
...
  Production-East2 [10.3.0.0/16](65534 hosts)
This structured approach not only ensures sufficient capacity for growth but also provides a clear blueprint for future expansion. With Astra, every aspect of your network's expansion is already thoughtfully planned and allocated, ensuring you're prepared for whatever comes next.
VPN & Internal Access
Why It Matters
Every company relies on a blend of services that are either intended for internal use only or are external-facing. It's crucial for internal services to remain accessible exclusively within the organization. This security is typically ensured through a VPN solution, which grants access to internal services solely to trusted employees.
However, VPN solutions come with their own set of challenges. They require ongoing maintenance and have historically presented complexities in administration. Plus, it's just one more thing you have to worry about.
Astra's Solution
Astra introduces a dual-strategy solution designed for both immediate ease of use and enduring robustness.
Firstly, Astra offers "Astra Connect", a tool that regulates access to accounts based on security groups. It facilitates temporary connections to internal services, subsequently revoking the access it had granted. This ensures a secure, but flexible, method of accessing internal resources temporarily.
However, Astra Connect is not viewed as a permanent fix. The long-term goal is to keep internal traffic restricted to the internal network. To achieve this, Astra support also offers the implementation of a WireGuard solution like Tailscale. This approach integrates seamlessly with Astra's permissioning system and provides enhanced security for on-premises services, offering a scalable and secure VPN alternative.
Account/Environment Separation
Why It Matters
In the early days of cloud computing, companies often deployed their products within a single account. Initially, this approach seemed effective, but it wasn't long before its limitations became apparent. The crux of the issue lies in the inherent differences between various environments, such as development, staging, and production. Each environment has unique requirements for security, reliability, and usability.
Consequently, blending these environments within a single account made it challenging to manage these distinct needs effectively. For instance, the flexibility and ease of use crucial for a development environment could compromise the stringent security needed in a production environment.
Astra's Solution
Astra is dedicated to adhering to best practices that preemptively address potential challenges.
Recognizing the importance of environment-specific considerations, Astra facilitates the implementation of a multi-account strategy for your cloud infrastructure. This approach allocates a separate account for each environment, with access control and permissions tailored to suit the specific needs of that environment.
By automating the administration, maintenance, and provisioning processes associated with a multi-account strategy, Astra simplifies the complexity of managing distinct environments. This ensures that each environment operates within its optimal parameters, maintaining the necessary balance between security, reliability, and usability.
Astra also divides your Terraform up in a way that is extendible and easy to manage as your team grows larger. The rough layout for your IaC repository will be:
root_directory --> <account/environment> --> <region> --> <team> -> Terraform code.
This division allows you to neatly chunk changes where they belong and enables you to stay organized and subvert the operational hardships of a single Terraform state that controls everything.
Telemetry
Why It Matters
Understanding the performance and behavior of your application is crucial. Without measuring the activities of your application, how can you be certain it's functioning as intended? Telemetry is the toolkit engineers use to verify that their creations are achieving the desired outcomes and to identify when they are not.
Developing a robust system for logs and metrics that serve as effective debugging tools is invaluable. Such a system not only aids in troubleshooting issues but also helps in anticipating problems before they escalate to a critical level.
Astra's Solution
The telemetry marketplace is highly fragmented, and understandably so, given that managing telemetry data is both costly and resource-intensive. Typically, companies face a choice between outsourcing this management or handling it in-house, each option having its significant advantages and disadvantages.
Short Term :: Small Team :: Simple
Astra attempts to make this easier in the short term by providing the following:
- Astra advocates for the adoption of OpenTelemetry which facilitates easy transitions between telemetry tooling.
- By default, Astra configures and utilizes CloudWatch for each service, providing useful dashboards from the outset.
- Astra's
service logscommand gives you quick access to your logs with basic filtering.
Long Term :: Larger Team :: Balancing expenses
For the long term, the strategy involves determining which approach best suits your organization—managing telemetry in-house or outsourcing it—and selecting an Application Performance Monitoring (APM) solution that aligns with your needs and the trade-offs you're willing to accept.
This decision may lead to Astra facilitating the setup of an internal APM system or integrating your application with one of the numerous third-party providers available, depending on what's most beneficial for your company's specific context.
Infrastructure as Code
Why It Matters
In the modern era of cloud computing, the ability to manage and provision infrastructure through code rather than through manual processes is not just a convenience—it's a necessity. Infrastructure as Code (IaC) allows for the automation of infrastructure deployment, leading to more consistent, reliable, and repeatable environments.
This methodology enables teams to easily manage complex cloud resources, reduce the potential for human error, and significantly speed up the deployment process. Additionally, IaC supports DevOps practices by enabling continuous integration and continuous deployment (CI/CD) pipelines, making it possible to integrate infrastructure changes alongside application development. It also enhances security and compliance by allowing for the codification of compliance policies and the automatic enforcement of these policies at the infrastructure level.
Astra's Solution
Astra leverages the power of Infrastructure as Code in the form of Terraform to streamline and secure the management of cloud resources.
By translating every change made via Astra into your Terraform repository, Astra not only provides transparency into the actions being taken but also offers the flexibility to modify these actions directly. This approach empowers you to gradually transition towards managing a full infrastructure team independently, ensuring that Astra's interventions align with your long-term infrastructure management and development strategies.
CI/CD & Distributed Cron
Why It Matters
In the realm of modern software development—a field I'm deeply invested in, as evidenced by my work on Gofer—the concept of "Distributed Cron" emerges as a crucial component. The realization that bespoke jobs, which cannot be seamlessly integrated into the core product, are necessary, highlights the need for two interrelated systems. One system is tasked with job processing, executing specific actions reliably. The other system focuses on executing code segments to automate and manage aspects of the software development lifecycle.
The success of these systems is vital, yet they are often overlooked or overly complicated by companies until they present significant challenges.
Astra's Solution
Addressing the automation aspect of software development, Astra provides strong support for and pre-configured setups with GitHub Actions. The ease of use and convenience offered by GitHub Actions make it the preferred choice for managing the small, yet significant, snippets of code that automate the software development cycle. This setup not only simplifies automation but also allows for the seamless integration of Astra deployments into these workflows.
The job processing component presents a more complex challenge, necessitating thoughtful software architecture decisions. Astra advocates for simplicity as the initial approach, recommending the development of simple state machines, enhanced by green threads, for products with smaller user bases. This strategy allows for gradual evaluation and adaptation to the product's evolving needs, informed by the market's offerings and the specific demands of the job processing tasks.
Going from Zero to One on your Infrastructure
An Aside
Core Infrastructure, while often deprioritized, is the backbone of any successful venture — be it a building standing tall or a software system running smoothly. Ignoring it is akin to neglecting the foundation of a house; eventually, the cracks will show, and the damage might be irreparable. Many companies have learned this the hard way, with their engineering teams overwhelmed and morale plummeting as they struggle with inadequate tools in a crisis of their own making.
But this doesn’t have to be your story. Today presents an opportunity — a chance to prioritize and invest in robust infrastructure and developer tooling. By doing so, you ensure not just the stability and scalability of your projects, but also the wellbeing and productivity of your teams. Let's commit to building strong foundations in our software, ensuring that the unseen becomes the unsung hero of our success. Together, we can avert the tale of the sinking ship and sail towards a future of innovation and growth.
Let's get started!
This is the first step on a promising journey! But like any good adventure we need to be prepared for what comes ahead. Astra will help you out with the truly daunting tasks, but a few things need to happen before that can take place:
Requirements:
1. Astra API Key
If you don't yet have an Astra API key, you'll need to contact support.
Astra uses this API key in order to provide convenience for certain commands. Most commands wont work without it.
2. AWS Management Account
If you haven't already go ahead and create your initial AWS management account.
A quick skim through this page should inform you on how to do it (The parts in red are especially informative.)
This account is very special and holds the keys to the kingdom. We'll be using it to set up the rest of your infrastructure and then locking it down for security.
🪧 If you've already created an account and have running infrastructure support will guide you on how to best proceed.
3. Install Prerequisites
You'll need to install both:
Astra uses these tools in order to create/document your infrastructure and orchestrate your authentication with AWS, respectively.
Once you're finished let's continue!
Installing Astra
Astra is available as a pre-compiled binary, making it straightforward to run on your local machine.
Whether you're a pro at adding programs to your system path or new to this, the process is simple!
Step-by-Step Installation Guide
1. Download the Binary
First, go to the Astra download page. Select and download the binary file that matches your operating system.
🪧 You can also use wget or curl to download the version of your choice by using the direct URL. You can use the downloads page to figure out what semver/distro/arch you require.
2. Move and Set Up the Binary
After downloading the file, you'll need to move it to a location in your system's path and make it executable. This allows you to run Astra from anywhere in your terminal.
For example, if you've downloaded the file to ~/Downloads, you can move it to /usr/bin (a common directory for executable files) and set it to be executable with the following commands:
~|⇒ cp ~/Downloads/astra_cli /usr/bin/astra
~|⇒ chmod +x /usr/bin/astra
~|⇒ astra --version
These commands do the following:
cp ~/Downloads/astra_cli /usr/bin/astra: Moves the Astra CLI file to /usr/bin and renames it to astra.chmod +x /usr/bin/astra: Makes the file executable.astra --version: Checks the installed version of Astra, confirming that the installation was successful.
🪧 If you're using a recent Apple distribution and downloaded Astra using your browser, attempting to run Astra might give you an error. To resolve this, simply find Astra in your finder app and press 'open'. This will bring up a confirmation which will mark the Astra binary as trusted. From there you should be able to use Astra normally.
3. All Set!
You're done! Astra is now installed and ready to use. Let's begin setting up your infrastructure!
The First Step
Congratulations on installing Astra! Now, let's dive into setting up your infrastructure.
Astra’s init command offers an interactive, step-by-step guided experience to set up your infrastructure from scratch. We’ll start by creating a dedicated directory for your Terraform files and then initiate Astra's setup process.
1. Create a Terraform Directory
Open your terminal and create a new directory where Astra will store your infrastructure Terraform files:
mkdir ~/Code/terraform
cd ~/Code/terraform
2. To Infinity!
Now, initialize Astra by running the following command:
astra init
Astra will prompt you for the API key discussed earlier. Enter your key, and Astra will create a configuration
file at ~/.astra.toml. This file stores your API key and other settings for the Astra CLI.
That's it! You can just follow the on-screen instructions from here. Astra will start the bootstrap process right after helping you set up your config file.
Key Points to Remember
- Astra sets up everything using Terraform and the AWS CLI, no need to configure them once installed Astra will handle that.
- Once you complete the astra init process, you'll have your generated Terraform code. Treat this code like any software project: use version control practices, and consider checking it into a private GitHub repository. When updates are needed, follow standard practices like using pull requests.
What you'll have after a successful bootstrap
Astra's bootstrapping process is comprehensive! Once you're done with it, your infrastructure will be all set up to handle anything you throw at it.
Here is a list of things Astra gets set up for you via the init command:
- Multi-Account Strategy: Creates
production,staging, anddevelopmentaccounts. Separating your workload types for better security and organization. - Single Sign On: Sets up AWS SSO, initial roles, users, and permissions. Enabling you to sign into any of the above accounts easily and securely.
- Terraform: Everything Astra creates is output into Terraform. Allowing you to further configure your environment using best IaC practices.
- Networking: VPCs, subnets, security groups, route tables, and more! Astra gives you all the networking configuration you need for now and the future.
- DNS: Allows you to connect your pre-purchased domain such that Astra can automatically create dns entries and it can be managed via Terraform.
- Container Architecture: Just like Kubernetes, Astra sets you up with a container orchestrator that enables easy scaling, zero downtime deployments, and general ease of management for your business logic applications.
You can view a more in-depth explanation of all the goodies Astra includes here.
Need Help?
- If you require assistance during any step of the bootstrapping process, Astra support is ready to help.
- Explore more Astra commands by running
astra --helpfor a complete list.
Creating additional users
After we're finished with bootstrapping, we'll want to let other people play with Astra and manipulate our infrastructure as well. We're already well primed for this; in our initial bootstrapping step we've set up our AWS SSO and now we can just add users and they'll automatically have access to our infra based on the roles we give them.
Let's explore the `astra user` command
We can type in astra user create --help to see how the command should be used.
~|⇒ astra user create --help
Create a new user and assign them into roles.
...
1. Move to your Terraform directory
In our bootstrapping step we defined a specific directory we would use for our Terraform files. We'll first need to navigate to that directory in order to run the user creation process. This is because, all users and their settings are written to Terraform, making it easy to update them or delete them.
cd ~/Code/Terraform
2. Decide what access we want the user to have
Astra uses AWS SSO to manage users and permissions via roles. These roles are distributed to particular accounts and only grant access to particular things within that account.
The role everyone gets by default is read-only which allows users to have read access to everything in
production, staging, or development base accounts.
All other roles need to be passed to the astra user create command in order for the user to have the appropriate
permissions for a particular account.
Here is a breakdown of the roles you receive out of the box with Astra:
| Role | Accounts |
|---|---|
| global_admin | all |
| read_only | all |
| production_admin | production |
| staging_admin | staging |
| development_admin | development |
The other global role that works on every account is the global_admin role. Only a few trusted users should have
the global_admin role as it has access to do just about anything. The global admin role is also the only role that
allows access to the management account by default.
🪧 If you need to see if an account houses a particular role you can always use the
astra account get <account_name>command.
3. Create the user
Let's just go ahead and create a normal user who has access to all our base accounts.
astra user create -r production_admin -r staging_admin -r development_admin
The user create command is interactive so it will prompt us for user details:
? User's given/first name ?: John
? User's middle initial (Leave empty for none) ?: F
? Family/last name: Doe
? Email: myemail+johndoe@orreri.dev
? Astra thinks the username should be 'johnfdoe' (Y/n): Y
It will then create the user within our Terraform repository and print out the user details:
✓ Created user 'johnfdoe'

│ Username:           johnfdoe
│ Astra token ID:     SDRbZ
│ Astra secret token: some_api_token_here
│ SSO Login Link:     https://d-9b770d4778.awsapps.com/start
│ User docs:          https://astra.orreri.dev/docs/cli_reference/init.html
Lastly, we just provide the user with these details (securely) and have them use the astra init command to get started.
🪧 Don't forget to check in the user terraform code that Astra gives you!
User Reference
This section serves as a reference for common cli actions for normal users of Astra, focusing on specific ways you can use Astra and features that might not be obvious at first glance.
It assumes the reader already has their infrastructure bootstrapped and they've been given an Astra API key via this step.
If you're just getting started you should start with the astra init command
Features:
- Account: View and manage your cloud accounts.
- Auth: Manage authentication for your cloud provider.
- Connect: Establish access from your machine to an internal account.
- Init: Initialize your Astra account, infrastructure, and CLI settings.
- Secret: View and manage your application secrets.
- Service: View and manage Astra-deployed services and create or deploy new ones.
- User: View and manage your cloud users.
- Whoami: Display general user and infrastructure information.
An aside:
Astra attempts to combine multiple parts of infrastructure and software development that are commonly poorly managed and typically cumbersome to use. It takes this goal very seriously and if you have feedback on anything that could be easier to use, found a bug, or just simply have an idea for a new feature, please reach out!
You can do so using your company's included Slack channel, via the website, or just simply send me an email at clint.edwards [at] orreri.dev.
Account Command
Astra's account command shows you details about your cloud accounts and allows you to alter or create new ones.
This can be helpful especially when adding users or roles to a specific account.
Command
~|⇒ astra account get production
Output
Account: production [335961027138]

│ type: Environment
│ available roles: [read_only, global_admin, production_admin]
│ ip_space: 10.160
│ dns_enabled: true
│ dns_domain_id: Z05247042B5NIDLD6DJJA
│ dns_domain_name: production.orreri.xyz

Created 2 months ago
Auth Command
Astra's auth command allows you to manage your authentication with your cloud provider. Commonly you might want to perform some action on AWS using command line tooling or your terminal. Astra's auth command makes it easy to switch between roles, accounts, and regions.
The Astra auth command leverages the AWS CLI to authenticate you via AWS SSO. It is imperative that you have installed
the AWS CLI and checked that Astra has permissions to use it via astra init.
The advantage of using AWS SSO is it allows Astra to be able to switch you quickly and easily to any role you have access to, enabling you to run command across accounts as you like. You will also only have to authenticate once per session which is by default 8 hours.
Let's go through an example
List all S3 buckets
Let's say for sake of example, you want to list your S3 buckets in production using the AWS CLI.
Normally, you would do this by typing:
aws s3 ls
However, you would encounter an error indicating that the AWS CLI lacks authentication information.
Astra to the rescue!
With Astra you can assume any AWS role you have access to by simply using the astra auth set command. This command
will authenticate you via AWS CLI and set you up with a proper AWS profile at ~/.aws/config.
You can then utilize this profile as needed. Let's give it a try.
# By default if we don't give Astra a role to set, it assumes we want the 'read-only role'
~|⇒ astra auth set production
✓ Set role 'read_only' for account 'production' in region 'us-east-2'
✓ Auth Successful! Remember to run `export AWS_PROFILE=astra` to use the new auth profile outside of Astra.
Now let's run the AWS CLI command again. By default Astra just sets the profile up, but our terminal (and therefore aws cli) does not know which profile to use and defaults to one without authentication. So we'll include a flag to let it know to use the 'astra' profile.
~|⇒ aws s3 ls --profile=astra
2023-12-15 11:55:04 terraform-state-225951027938
✅ Success!
Can it be any easier?
Indeed, it can! If you prefer to run AWS CLI commands without constantly having to append `--profile=astra`` to everything, you could set your profile via environment variables instead:
~|⇒ export AWS_PROFILE=astra
~|⇒ aws s3 ls
2023-12-15 11:55:04 terraform-state-337451047959
But wait! There's more!
You can streamline the process with a single command by using your terminal's eval command.
🪧 The terminal eval command can be risky if you're unsure of its operation, so ensure its use is restricted to trusted contexts.
~|⇒ eval $(astra auth set production --eval)
~|⇒ aws s3 ls
2023-12-15 11:55:04 terraform-state-225951027938
Connect Command
Astra's connect command is designed to provide an easy way for you to connect to internal services.
It's important to understand that Astra's connect command is NOT a VPN. This means that your traffic will follow normal internet routes to reach its destination. Consequently, any activity conducted without a secure protocol could potentially be intercepted by an intermediary.
Therefore, when using Astra's connect command, you should always use secure methods to interact with your
target service. For example, you can access a web service via HTTPS (which is automatically configured for you
through astra service) or connect to a PostgreSQL database via psql using sslmode=require.
Why would we ever use the connect command?
As an example, let's say we just brought up a new service within our staging environment. Typically our staging environment isn't meant for public consumption and may not have gone through the rigorous processes around it being exposed to the world wide web.
But we still need the ability to test and operate on staging. The long term goal here is to set up a VPN such that we can communicate with staging privately. In the short term though we can just give our IP address temporary access and communicate with staging using HTTPS so we know our traffic is secure.
Hole punching made easy
Let's access our staging environment with a simple Astra connect command:
~|⇒ astra connect permit staging
!! Removed old rule for 82.72.149.211:443
✓ Added new rule for 82.72.149.211:443
✓ Rules updated successfully! Here are some important reminders:
!!  • Your access will be revoked 8 hours after it is granted.
!!  • Astra connect is NOT a VPN. Always use secure methods for connecting to services accessed through this tool.
!!  • Ensure secure connections when accessing databases and other services.
Init Command
The init command in Astra equips you with the necessary tools to start leveraging Astra right away.
It's designed for both new users embarking on their Astra journey and existing users needing to
configure the Astra CLI application.
Getting Started
If you're looking into the init command in order to start your journey and create your infrastructure, you can
view more about the bootstrapping step here.
If you've already bootstrapped your infrastructure and just need to set up your Astra CLI app, keep reading!
Prerequisites
Software
To use the init command effectively, ensure you have installed:
Astra uses these tools in order to create/document your infrastructure and orchestrate your authentication with AWS, respectively.
API Key
You should have been given an API key by your administrator or Astra support. If you have not received this yet, make sure your administrator or support has created you as a user.
Installing Astra
Installing Astra is straightforward due to its single binary CLI format. Follow the instructions on this page for detailed installation steps.
Configuration
Now that you have everything in place you can simply run astra init.
Astra will prompt you to input your API key and create a configuration file in your home folder to store it.
It will also inform you if the tooling mentioned above is installed correctly and Astra has permissions to use them.
Finished!
Congratulations! You've successfully set up Astra.
You can test out your new powers by running the whoami command
~|⇒ astra whoami
User Information:
-----------------
 │ Customer ID    : orreri
 │ API Key ID     : apupA
 │ Account State  : Active

Infrastructure:
-----------------
 │ SSO Instance ID : d-2a680d4762
 │ SSO Start URL   : https://d-2a680d4762.awsapps.com/start
 │ Default Region  : us-east-2
 │ Bootstrapped:   : true
Start exploring its capabilities by referring to the CLI Reference. This guide will help you manage your infrastructure effectively using Astra.
Secret Command
Application secrets are extremely important and can be very cumbersome to manage on your own.
The secret command allows you to manage your application secrets via an easy to use interface that interfaces with the container orchestration system Astra has provided.
An example
First, in order to input secrets, you must already have a service for which you wish to create secrets for. If you need help with this you can read more about the service command here.
For this example we will assume we have a service called testbed which exists in our production account.
Let's start by reviewing the existing secrets for testbed:
~|⇒ astra secret list testbed production
|     key     |    created   | last_changed | last_accessed |
|-------------|--------------|--------------|---------------|
| my_key      | 2 months ago | a week ago   | 2 weeks ago   |
| another_key | 2 months ago | 2 months ago | Never         |
Update a secret
Inserting or Updating a secret is very very easy and safe. By default AWS' secret manager allows for versioned secrets which Astra takes full advantage of in order to give you, the user, an easy way to alter a secret key's value without worrying about incurring downtime from swapping the underlying value.
We simply use the --overwrite command to tell Astra that we're aware that the previous secret key is already populated.
~|⇒ astra secret put testbed production my_key="some_value" --overwrite
✓ Successfully stored secret!

To use this secret, include it into your manifest file like so:

    '''
    secrets = [
        {
        name = "TESTBED_MY_KEY",
        valueFrom = "arn:aws:secretsmanager:us-east-2:317441058719:secret:astra/staging/testbed/my_key-b1IfAz:::88075348-b95a-439a-c39b-07df4f08a7b1"
        },
    ],
    '''
~|⇒
Insert the newly created secret into our manifest
With the secret stored, the final step is to update your application's manifest to utilize the new secret.
So let's navigate to our manifest file and copy-paste in our new secret key.
cd ~/Code/my_app
vim ./service_manifest.production.hcl
✅ Success! On the next deployment, the testbed service will automatically use the newly configured secret as an environment variable.
Service command
The service command is one of Astra's more powerful commands as it directly ties into a lot of the developer experience around managing an application.
Let's jump right in by going over a few examples of what it can do.
Service Create
The create command is the most powerful as it provisions all the infrastructure for a new application. But even with this power the command is effectively very simple to use.
It's important to note that since this command creates a lot of infrastructure for your service it requires us to be within our Terraform root directory.
Here is a simple example:
~|⇒ cd ~/Code/terraform
~|⇒ astra service create testapp staging internal
┌─ Astra service setup
┊
├─ To setup a brand new service we'll need to initialize the infrastructure that allows you
│  to manage and deploy the service.
│
│  We'll set up the following for your service:
│    • An ECR (Elastic Container Registry) repository for container management.
│    • Load balancers along with appropriate target groups for efficient traffic distribution.
│    • An ECS (Elastic Container Service) service definition to manage your containerized applications.
│    • A starter ECS task definition to initialize your containers and define core functionality like logging.
│    • Necessary DNS entries and TLS certificates for secure, reliable connectivity.
┊
├─ Astra will attempt to use Terraform to create this infrastructure on your behalf.
This command will first prompt you with the infrastructure it's about to create and then run terraform apply on your
behalf.
This could take a while as Astra creates and validates the network settings, security groups, container orchestration settings, certificate validation etc.
✅ Once finished you will be presented with information about your newly created service!
├── ✓ Created new service testbed
┊
├─ You can visit your service at:
│    • https://testbed-13457782464.us-east-2.elb.amazonaws.com | LB address
│    • https://testbed.us-east-2.staging.orreri.xyz | Default service address
┊
├─ What to do next?:
│    1) Commit the newly created Terraform service files into version control.
│    2) Upload your app container to the newly created ECR repo: 317441045785.dkr.ecr.us-east-2.amazonaws.com/testbed
│    3) Perform your first deployment!
│      • CLI docs: `astra service deploy -h`
│      • Web docs: https://astra.orreri.dev/docs
- After you're finished don't forget to check in the code Astra inputs into your Terraform directory.
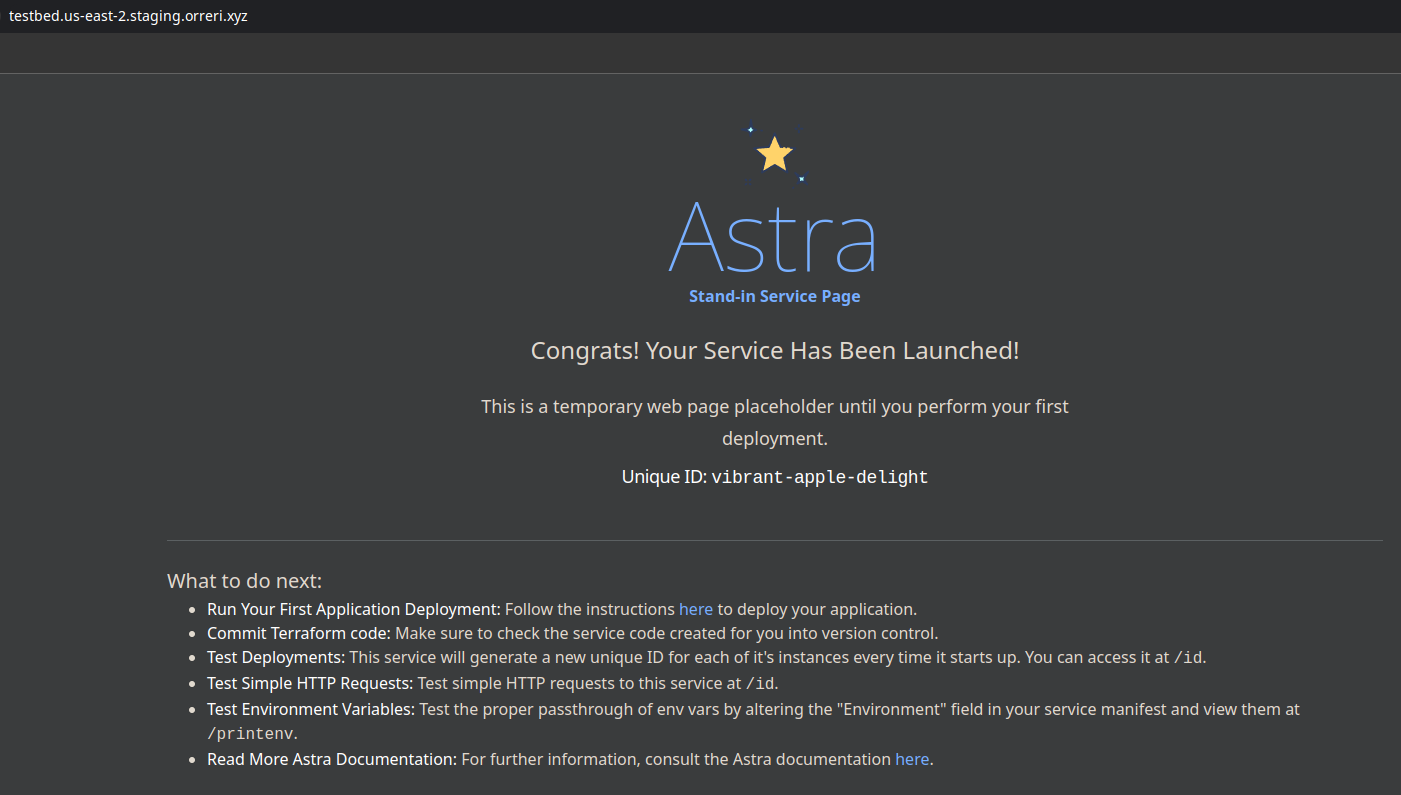
- You can also use the links mentioned in this output to visit the temporary landing page for your new service.
Astra's Stand-in Container
Visiting your service without running any other commands will present this temporary landing page, provided by a default Astra container.
It has a few helpful endpoints for observing Astra's deploy process and allows you to get the hang of how your application will function ahead of time.
Service Generate-Manifest
After you've created your service with the service create command you'll need some way to configure and update that service.
Astra streamlines service deployment through the use of a "manifest" file. This crucial file contains
configuration settings for your service. When you initiate a deployment with the service deploy command,
Astra automatically locates this manifest file. It then translates the configurations within the manifest into
live settings, effectively deploying or updating your service according to the defined parameters.
But writing a manifest file from zero doesn't seem like that much fun. So Astra gives you the default manifest file that it uses during the create step to create your service welcome page.
Creating the manifest file
cd ~/Code/my_app
~|⇒ astra service generate-manifest testbed staging
✓ Created service manifest at "./service_manifest.staging.hcl".
Few things here to mention:
- Keep the manifest file next to your code: Best practices dictate that you should keep your manifest file as close to your application code as possible. Keeping it in your repo's root directory is somewhat of an early convention. Most importantly though make sure you're keeping it in version control. This allows you to quickly rollback to an earlier version and revert any changes quickly.
- Run deploys from the same directory as your manifest file: When you run the
service deploycommand (using defaults) Astra will look for your manifest file in the current directory.
Inside the manifest file
Inside the manifest file you will find a large amount of settings you can configure for your application.
~|⇒ cat ~/Code/my_app/service_manifest.staging.hcl
containers = [
  {
    name      = "testbed",
    image     = "ghcr.io/orreri/astra-standin-container:latest",
    cpu       = 256,
    memory    = 512,
    essential = true,
    portMappings = [
      {
        containerPort = 8080,
        protocol      = "tcp"
      }
    ],
    environment = [
        {
            name  = "ASTRA_TEST_VAR",
            value = "change_me"
        },
    ],
    ...
The most important configuration options are:
- cpu/memory: Allocate sufficient CPU and memory resources for your application container. If your application frequently becomes unhealthy or gets killed due to resource exhaustion, consider increasing these values.
- image: Specify the container image to be used by Astra for your application.
It's recommended to update the docker tag at the end of the image string (e.g.,
latest) for each deployment. This ensures that Astra updates the container and helps you track the version of the software in production. - environment/secrets: Use this section to define values that will be passed to your container as environment variables. This approach allows you to manage configuration in a cloud-native way, ensuring that you have full visibility into the production environment.
🪧 It's also important to note here that Astra has set some defaults that you should be aware of when creating your application container. Namely the service within should run on whatever the "containerPort" variable is set to. This allows the container orchestrator to understand where it should send traffic.
Service Deploy
The service deploy command is a quick and easy way to deploy your application using the current best practices.
It takes advantage of the previously set up infrastructure and deploys your application with zero downtime and zero hassle.
Let's give it a go:
Setting up our manifest file
The precursor step to deploying is having something to deploy in the first place. The way Astra reads these changes is via the manifest file mentioned above. For this example we'll pretend we've simply updated the version of our software going out by updating the version number on our application container.
🪧 Remember it's good practice to keep your manifest file close to your code. This makes it easy to track changes and configure your CI/CD to deploy your application automatically.
Starting the deployment
First we need to be in the same directory as our manifest file mentioned above.
~|⇒ cd ~/Code/my_app
~|⇒ ls -al ./service_manifest.staging.hcl
Then we can simply run the astra service deploy command
~|⇒ astra service deploy testbed staging -w
The -w flag here allows us to watch the deployment, very useful if we're not sure the deployment will succeed and
we want to monitor it manually.
Omitting the -w flag will return immediately and we wont get to see the fun!
Let it cook
Astra guides you on the rest from here.
- First, Astra makes sure you have the correct permissions to continue forward.
- Secondly, it evaluates and provides a diff between what is currently running and what is about to deploy.
- Once that diff is approved, it starts a "rolling deployment" where the old version of the application is slowly removed and replaced with the new container.
With the watch flag enabled you will see the event logs as your container orchestrator deploys your application. Any errors will be noted here so you can address them.
Once all containers are replaced with the new version the deployment will end.
? Approve the proceeding changes? (y/N): y
✓ Diff Approved
✓ Deployment 'ecs-svc/343312Z094900432416' started!
Events:
 │ 20:19:44 :: has reached a steady state.
 │ 20:20:03 :: has started 2 tasks: (task 576e832714554f6a810f5ad936a58990) (task e5d34184830655538e2f94a8a6ef1d9a).
 │ 20:20:23 :: registered 2 targets in (target-group arn:aws:elasticloadbalancing:us-east-2:217331048788:targetgroup/testbed/041e551fa2e073fa)
 │ 20:21:11 :: has stopped 2 running tasks: (task f000461cc1ea483f90e1be821f937c63) (task 7dc17ce4119746caa2edfabf9441f95e).
 │ 20:21:22 ::(service testbed, taskSet ecs-svc/9654828164620583765) has begun draining connections on 2 tasks.
✓ Deployment completed!
🪧 Currently, once a deployment has started it cannot be halted, but it can be replaced by another deployment. Simply start another deployment with the
--forceflag to stop the current deployment and start another one.
Service Logs
The logs command is a quick and dirty way of viewing application logs.
That's it... No marketing speak, it just does what is says on the tin.
~|⇒ astra service logs testbed staging
[a58980] :: 2 minutes ago :: 2024-02-09T01:34:31.163260Z DEBUG request: finished processing request latency=43 μs status=200 method=GET uri=/ version=HTTP/1.1
[a58980] :: 2 minutes ago :: 2024-02-09T01:34:31.167440Z DEBUG request: finished processing request latency=41 μs status=200 method=GET uri=/ version=HTTP/1.1
[ef1d9b] :: 2 minutes ago :: 2024-02-09T01:34:31.168158Z DEBUG request: finished processing request latency=26 μs status=200 method=GET uri=/ version=HTTP/1.1
[a58980] :: 2 minutes ago :: 2024-02-09T01:34:31.196957Z DEBUG request: finished processing request latency=33 μs status=200 method=GET uri=/ version=HTTP/1.1
[ef1d9b] :: 2 minutes ago :: 2024-02-09T01:34:31.199123Z DEBUG request: finished processing request latency=62 μs status=200 method=GET uri=/ version=HTTP/1.1
At the beginning of each log line is the last six characters of the origin container's id. This helps with identifying where a particular log is coming from.
Of further interest might be the --tail and --filter flags which allow you to continuously stream logs as they come in
and filter logs by a naive string filter respectively.
The --filter flag is useful in case you want to filter only for a particular container's logs or maybe are just
looking for a specific string.
~|⇒ astra service logs testbed staging -f a58980
[a58980] :: 2 minutes ago :: 2024-02-09T01:34:31.163260Z DEBUG request: finished processing request latency=43 μs status=200 method=GET uri=/ version=HTTP/1.1
[a58980] :: 2 minutes ago :: 2024-02-09T01:34:31.167440Z DEBUG request: finished processing request latency=41 μs status=200 method=GET uri=/ version=HTTP/1.1
[a58980] :: 2 minutes ago :: 2024-02-09T01:34:31.196957Z DEBUG request: finished processing request latency=33 μs status=200 method=GET uri=/ version=HTTP/1.1
User command
The user command is an admin level command that allows users with global_admin permissions to create additional
users in Astra and within your cloud.
Instead of rehashing the basics of this command here, the bootstrapping section already does a great job at explaining.
Whoami command
The whoami command is a very simple command to check information about your user and environment.
~|⇒ astra whoami
User Information:
-----------------
 │ Customer ID    : orreri
 │ API Key ID     : apupA
 │ Account State  : Active

Infrastructure:
-----------------
 │ SSO Instance ID : d-2a680d4762
 │ SSO Start URL   : https://d-2a680d4762.awsapps.com/start
 │ Default Region  : us-east-2
 │ Bootstrapped:   : true
The most important part of this command is the SSO Start URL, through this URL you can log into the AWS
web console, in case you need the AWS UI to perform some action.